|
A fine selection of new problems have been developed at Bryn Hel in the Cwm Glas Bach area of the Llanberis Pass. NWB site editor, Si Panton, has been the main activist here, but a few others (notably, Andy Godber and Ben Freeman) have dipped in with good additions.
Developments have gone on over the last year or so, but the recent popularity of the 8A, Corridors of Power, has brought things to a head.
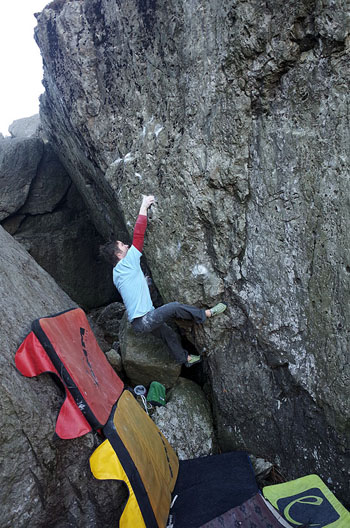
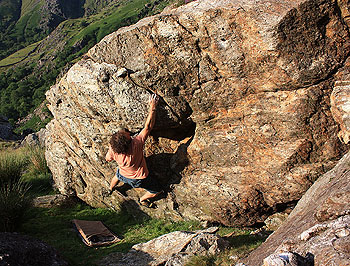
At the edge of the corridor is a hanging rib; this is Gravitas, a 7A+/B! climbed by Ben Freeman. This is an excellent but intense problem with a bold finish above the rock slab. Start sitting with undercut pocket for right and low pinch for left. Power up the steepness to reach some better holds, then make a long lock up to an obvious rock scar hold before grasping the top. To see a film of the first ascent click here.
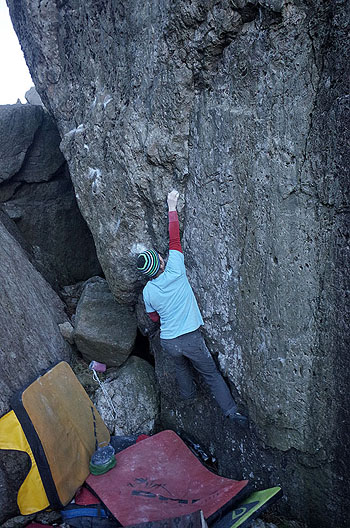
Just to the right Si Panton climbed Y Senedd Left Hand 7A+/B!. This shallow groove, squeezed in just left of Y Senedd, is surprisingly independent. Start sitting, left hand: layaway, right hand: edge. Gain the gas pocket with your right then climb up the shallow groove to its left until the holds on Y Senedd stand up can be snatched. Finish boldly as per Y Senedd (which, on reflection, is probably 7A!). Andy Godber added the obvious sit down to his own problem, Y Senedd, taking the gas pocket with his left hand this went at about 7A+/B! too.
Farther right along the leaning flat wall, past a couple of easier cracklines, there are some more top quality problems climbed by Si. Blood Moon Direct sds 7A+/B starts sitting or in a very low crouch in the centre of the wall (left hand: pocket or higher sidepull, right hand: two finger pocket). Climb up and rightwards and make a big pull to gain a rock scarred thin edge (with your left hand). Continue with hard moves up right (using the intermittent crack feature) to the juggy ledge. Traverse off right to descend. The stand up version is 7A+.
At the far right side of the wall is Half Moon sds, a soft 7A. Start in a low crouch or sitting start (left hand: side pull, right hand: crozzley sidepull undercut pocket thing). Snatch up for a few moves and continue straight up on the right side of the intermittent crack feature, with a hard finishing move to gain a heather shrouded shoulder up right or the juggy ledge on the left. The stand up version rates about 6C.
The last significant line here is Blood Moon 7A+ - this follows Blood Moon Direct sds for four moves, but then veers off rightwards to finish up Half Moon. This gives a logical and sustained problem - superb stuff!
6m to the right there is a three tiered collection of walls. The lower Uffernal wall has some good grade 5 and 6 problems on superb rock. 20m to the right is an attractive looking brown wall which is often wet Ray Woods excellent Suprasternal Notch 6A climbs the line of rightward facing layaways to gain the obvious notch handhold up left.
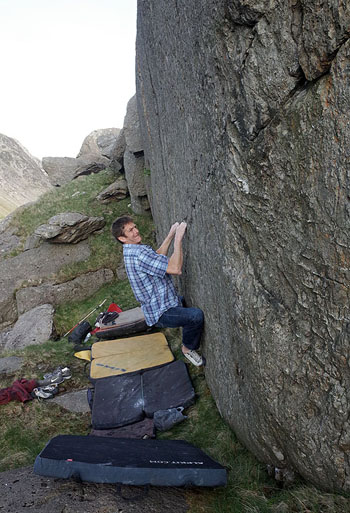
The free standing block 10m back from the crag base has one good problem on the steep left hand face: The Durutti Column 6A+ [first ascent by Mark Lynden] starts sitting on the left and follows the thin break rightwards (with the help of a low jug). A tricky match after the jug leads straight into a powerful pull for a good jug in the diagonal break above the bulge. Continue out right past a pocket and top out directly above.
On the second tier (above the Uffernal wall) there is a big flat wall rounding off at the top and split by four parallel cracks this is the Heinous Hone Wall. The ledge beneath the wall is fairly wide but care should be taken not to stumble back off the edge. It is best reached from the right (a reverse of the Uffernal wall descent).
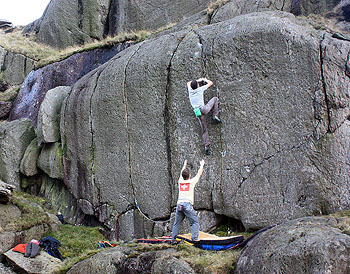
The thin righthand crack is Spikeful a 7B! first climbed by James McHaffie back in 2006. Heinous Hone 7A/+! Is an old E5 6c first climbed by Martin Crook in 1994 it tackles the thin, clean crack (two cracks to the left), with help from the central crack line.
More recently Si added to two excellent traverses to the wall; The Gatherer 7A+ is a powerful line with directional holds and some great moves. Start sitting (or in a low crouch) in the niche below Spikeful, using the big fat layaway (left hand). Pull up to a finger jug then swerve leftwards, powering past the cracks, to gain a good hold at the left side of the wall. Continue along the obvious traverse line under the hanging block, and then exit up left from a good jam. The obvious square block sticking out from the base of the wall at the left side is not in the problem was originally done with this, staying low, but the block was subsequently eliminated after a higher pod was cleaned out in the left most crack.
Sis second traverse, Raptors Delight 7B, is a super intense problem, following the thin rising break line on the right side of the wall. From the same sds as The Gatherer at the base of Spikeful pull up and then head rightwards along the thin break to a final heartbreaker move to gain the juggy ledge on the far right.
Up on the third tier there are a pair of highball problems. Some Routes are Smaller Than Others 6B+/6C! tackles the right-hand line and was first climbed by Adam Wainwright in 1994. The left-hand line on the wall (just right of the grim looking offwidth) is Mark Katzs Frankie Four Pads, an unconfirmed 7A+! first climbed back in 1998.
Relevant links:
Y Senedd news item
Corridors of Power news item
|